Happy New Year! Last year, I realized that I had scaled down my sewing a great deal. It wasn't really intentional, it was that I only sewed the things that I was really into. As I was going over the last decade, I remember the years that I felt like I had to be running to Jo-Ann's and Hancock Fabrics to grab every single new pattern that was released on the first day of the sale and then be the first person to sew up the newest Vogues. Y'all, that shit got old and I got bored with the releases. I haven't been feeling a lot the new patterns in the last few years, and I've been reaching into my stash for oldies but goodies that I never got around to sewing.
Which leads me to this: I finally got the red coat that my closet needed. I've been wanting one for years and I wanted it to be a classic silhouette with great details. I didn't want anything trendy, I wanted something that would age well.
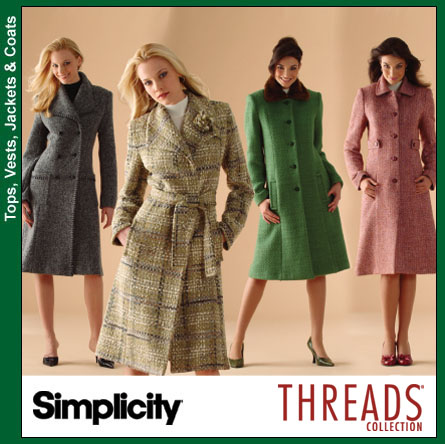
I reached way back into my stash and pulled out Simplicity 4403. It's been out-of-print for years.
It's a Threads pattern, which means it has great details and instructions, even if you've never made a coat before. This one is worth scouring Etsy and Ebay to find.
I'll just list all of the supplies I used for this coat:
- Primary Red Blended Wool Coating (It's sold out, but they have beautiful coatings)
- Fur (From Jo-Ann's)
When sewing with wool, you always have to preshrink it. I used the dryer method. I put the entire piece of uncut fabric in the dryer with a wet towel and set it to high. This is the best way to steam shrink wool at home. But you have to use common sense. Use a well-used towel that won't produce a lot of lint in a similar color to your fabric. Because if you put a new-ish white towel in with black wool??? You'll be pissed. You've been warned. Or, skip all of this and take it to the dry cleaner.
I cut the size 14 and graded out to a 18. I wanted to make sure it wasn't pulling across the hips. I made a 1" FBA, made 1" swayback adjustment, 1.5" full seat adjustment (because if not, the coat would hike up on the back hem) and I added 2" to the overall length.
I added a back stay with my hair canvas and made custom shoulder pads and sleeve heads using polyester batting.
I modified the under collar by creating a center back seam and cutting both pieces on the bias. And I just hand stitched the under collar to the fur upper collar.
I love that this pattern instructs you to make bound buttonholes.
With the thickness of my fabric, that would've been my obvious choice.
For the lining, I simply bagged and added hanging chain and decorative piping.
I hadn't made a coat in 3 years and I really enjoyed the process, even if it took me 2 weeks to get this cut out and completely sewn. It was so worth it because I love it so much!


.JPG)


