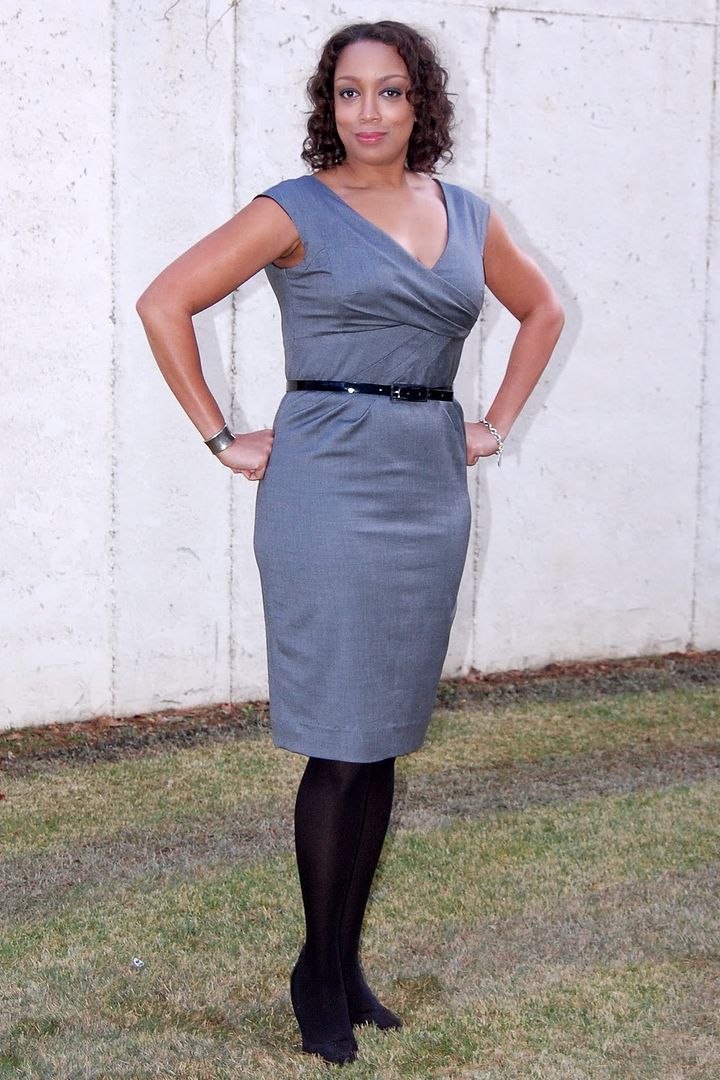
 Project Details:
Pattern: Vogue 1117
Description: Lined, fitted dress, below mid-knee length has pleated bodice, tucked front, invisible back zipper and center back slit.
Pattern Sizing: 4 - 18, I cut the 14.
Did it look like the photo/drawing on the pattern envelope once you were done sewing with it? Actually, it looked more like the original design!
Fabric: Black and White Stretch Wool Tweed
Were the instructions easy to follow? The instructions were well written. But I agree with Allison about the "Average" rating of this pattern. I think it should have fallen into the "Advanced" category. This is not a pattern where you can just gloss over the instructions and go for it. Nor is this an afternoon project. You have to make sure that you make all of your markings, read every step and sew in the order suggested.
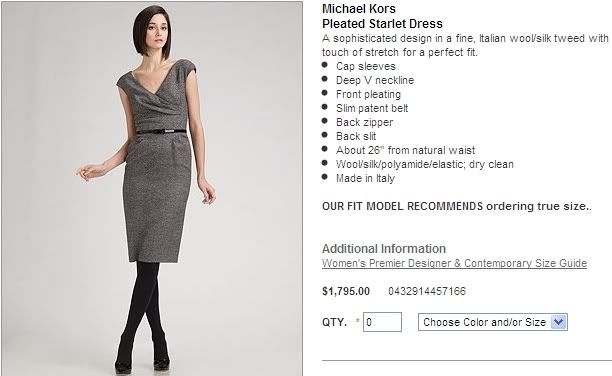
What did you particularly like or dislike about the pattern? I love most of Vogue Pattern's "major" designer patterns. This pattern was identical to the Michael Kors Collection "Starlet" dress. I love the v-neck, the draped bodice and the diagonal seaming that I've been seeing everywhere. I always get sucked in by the details.
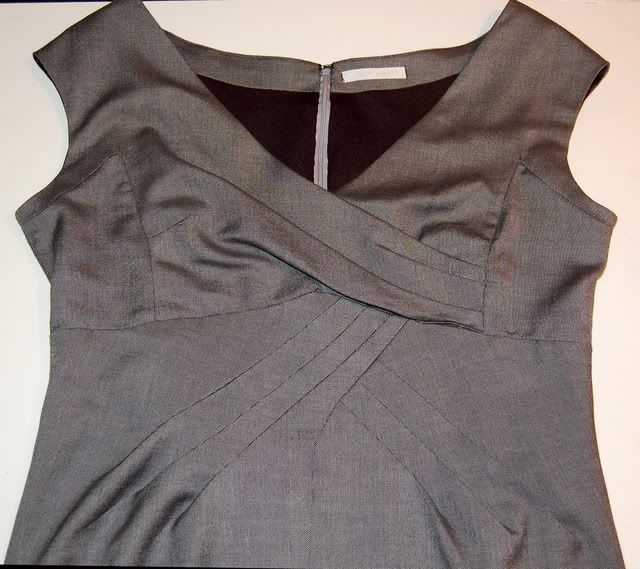
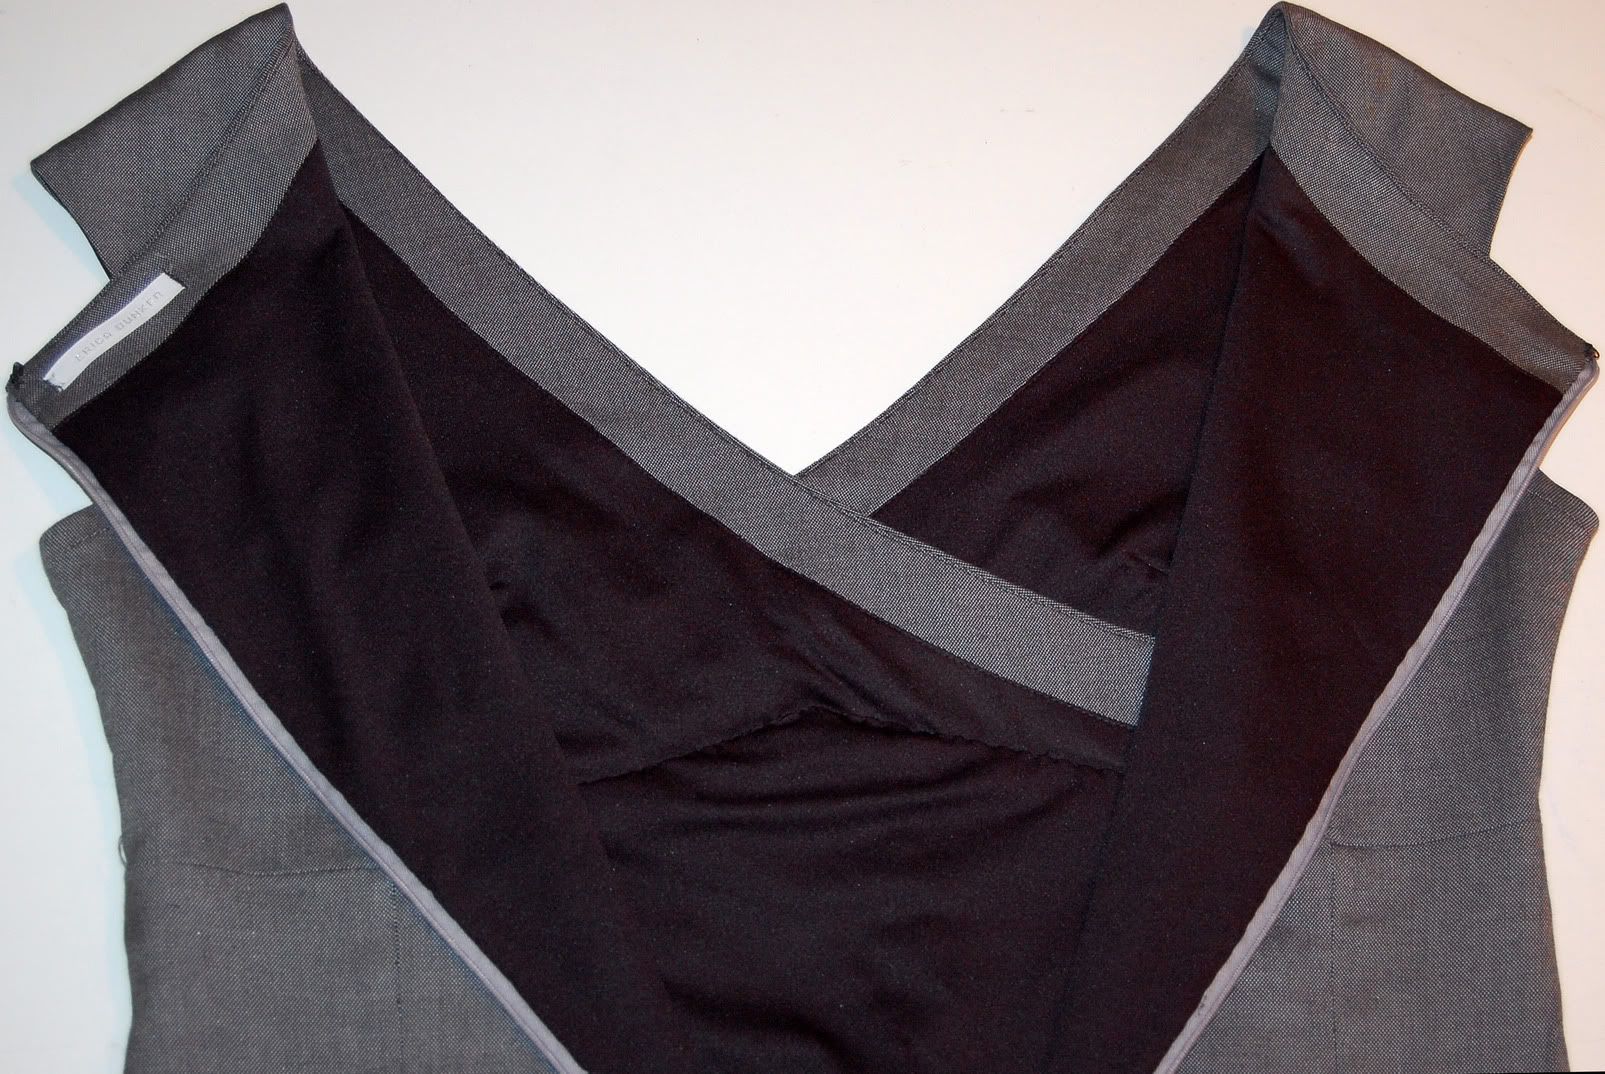 I've notice that Michael Kors uses facings on his linings. Anybody else ever noticed that or any other designers that use this technique?
Now let me tell you what I didn't like:
At step 8, they would have you use a 2" stabilizing remnant sewn to the outside at the pivot point where the bodice side is to be attached to the bodice front.
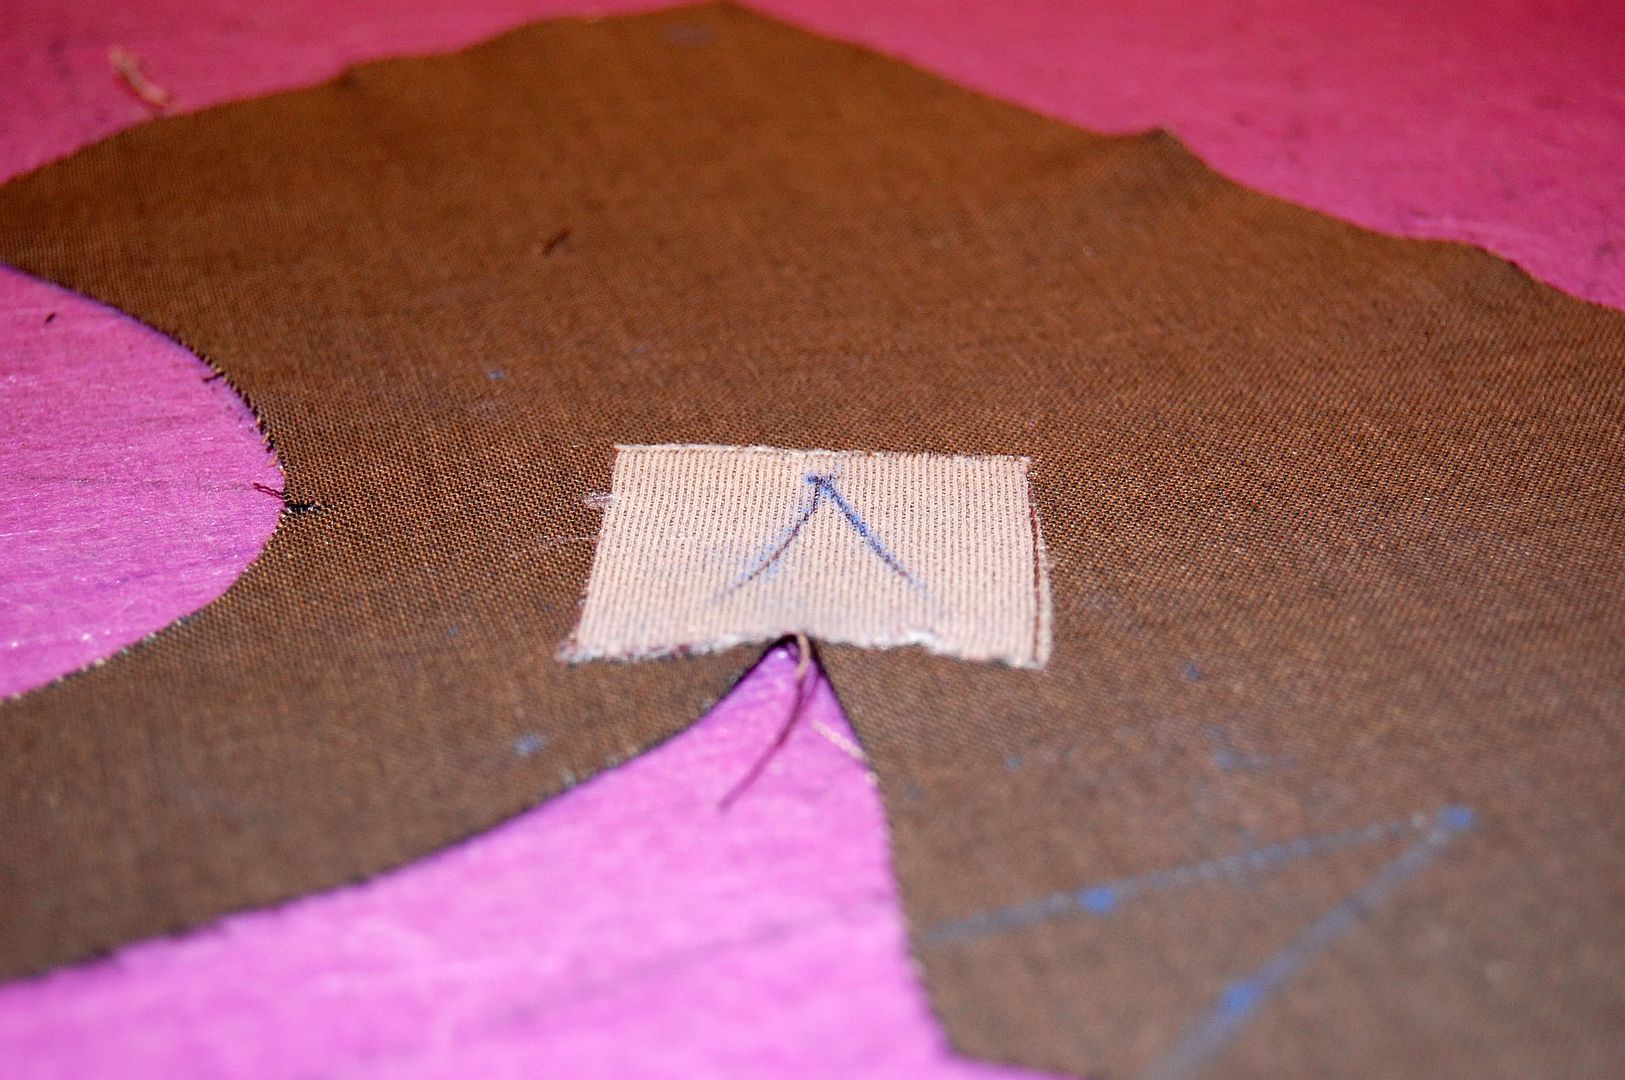
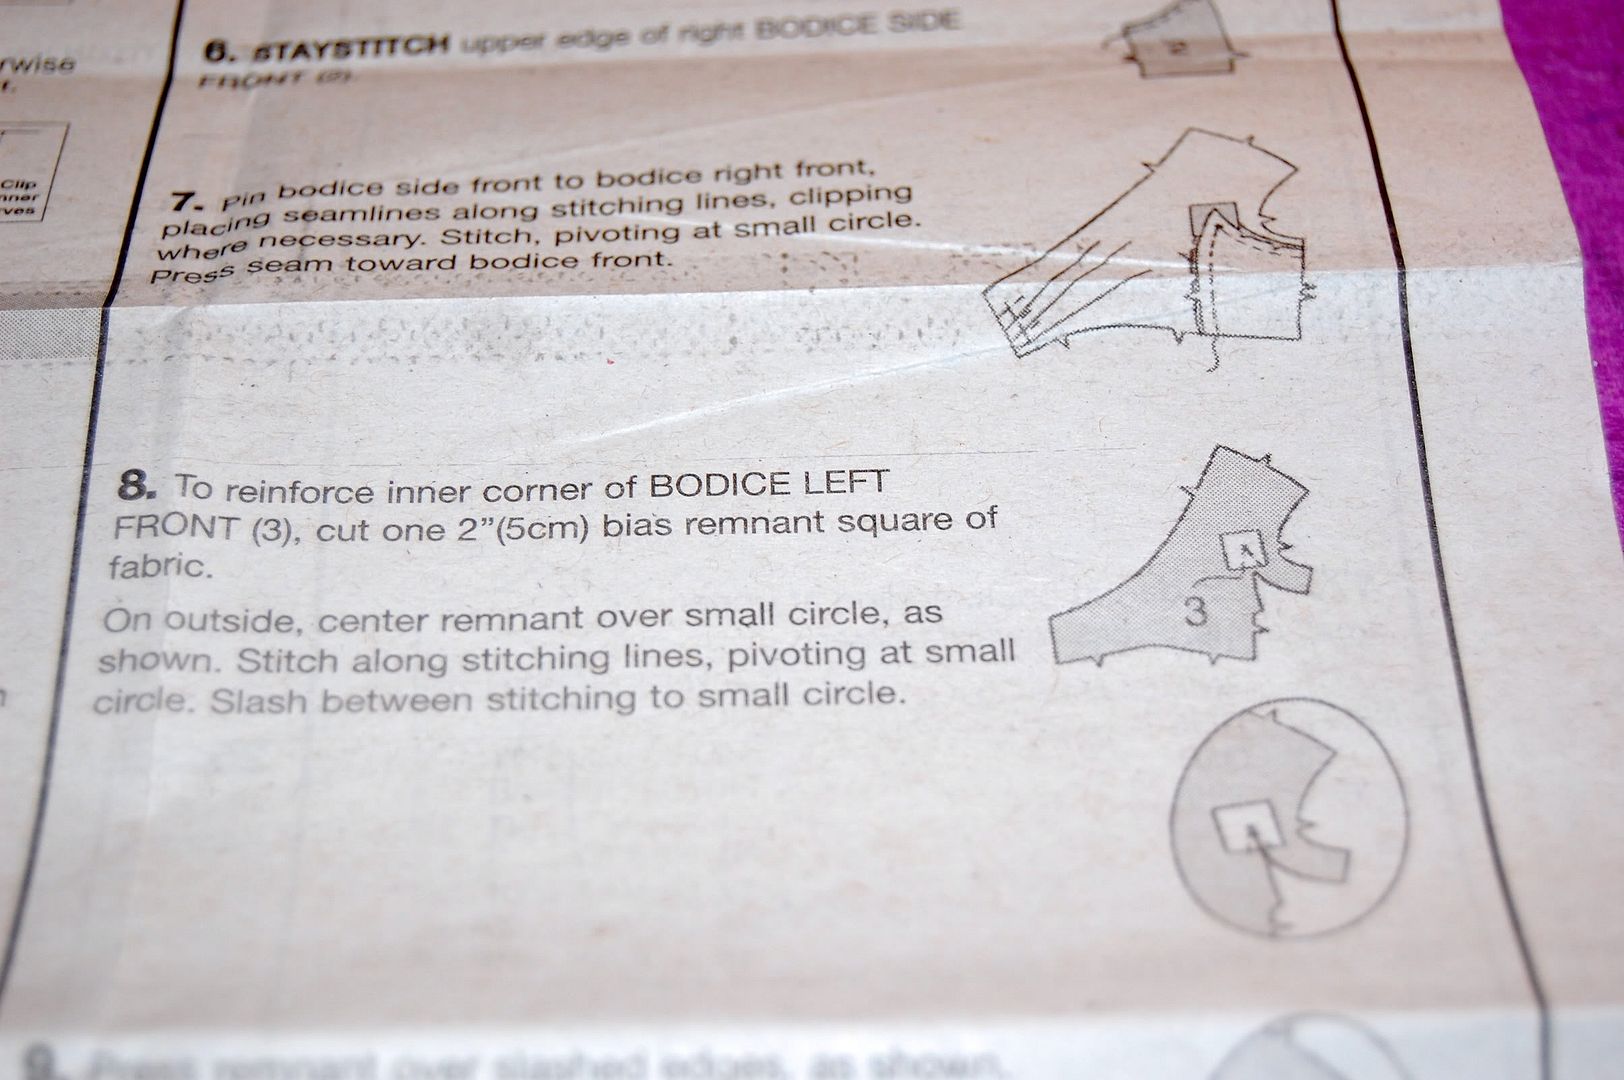 This is one of those unnecessary steps that I feel take this pattern from (what they claim) is "AVERAGE" to "ADVANCED". Now I know earlier, I told you to follow every single step in the order suggested. BUT, this is one of those times where you don't have to.
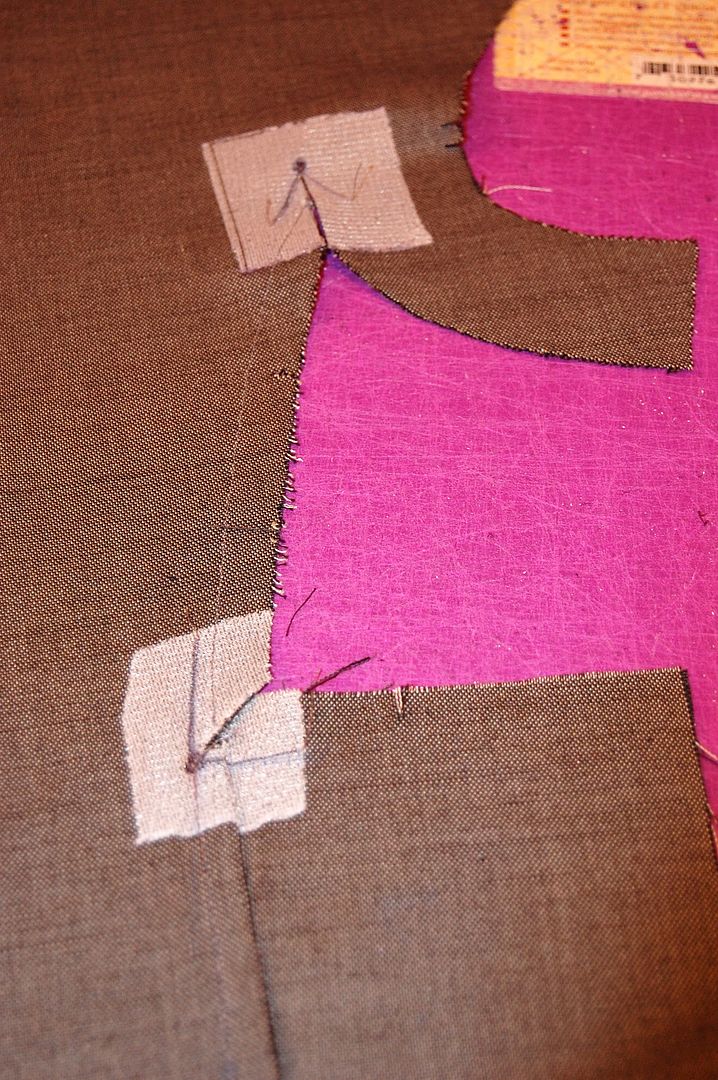
In order to stabilize the pivot points on the front and back pieces, I used a 2" piece of fusible interfacing on the inside.
"When you know better, you do better." -- Maya Angelou
Pattern Alterations or any design changes you made: Other than the above mentioned step, I added 1" at the hem. For those of us that think we have to make a FBA on everything, you may want to look closely at the the finished measurements printed on the pattern pieces because I didn't need to do one.
Would you sew it again? Would you recommend it to others? I usually say "probably not", but I think I will sew this again for Spring/Summer. I do highly recommend it!
Would you sew it again? Would you recommend it to others? I usually say "probably not", but I think I will sew this again for Spring/Summer. I do highly recommend it!

Hi. My name is Janice. I made the same dress but out of a gray glen plaid with a silver thread. I tried to copy the original dress I had seen in a magazine which was in a brown glen plaid. It took me a little longer than I cared to spend on this dress but it turned out great! Wish it had some stretch though. It was a close fit and doesn't leave much room for a pound or two extra which I have put on recently! Thanks for the tip on not using that stabilizing piece cause I had enough of trying to just match the plaids. I'm a person that's gotta have the matching plaids! Maybe I'll post the picture one day....
ReplyDelete