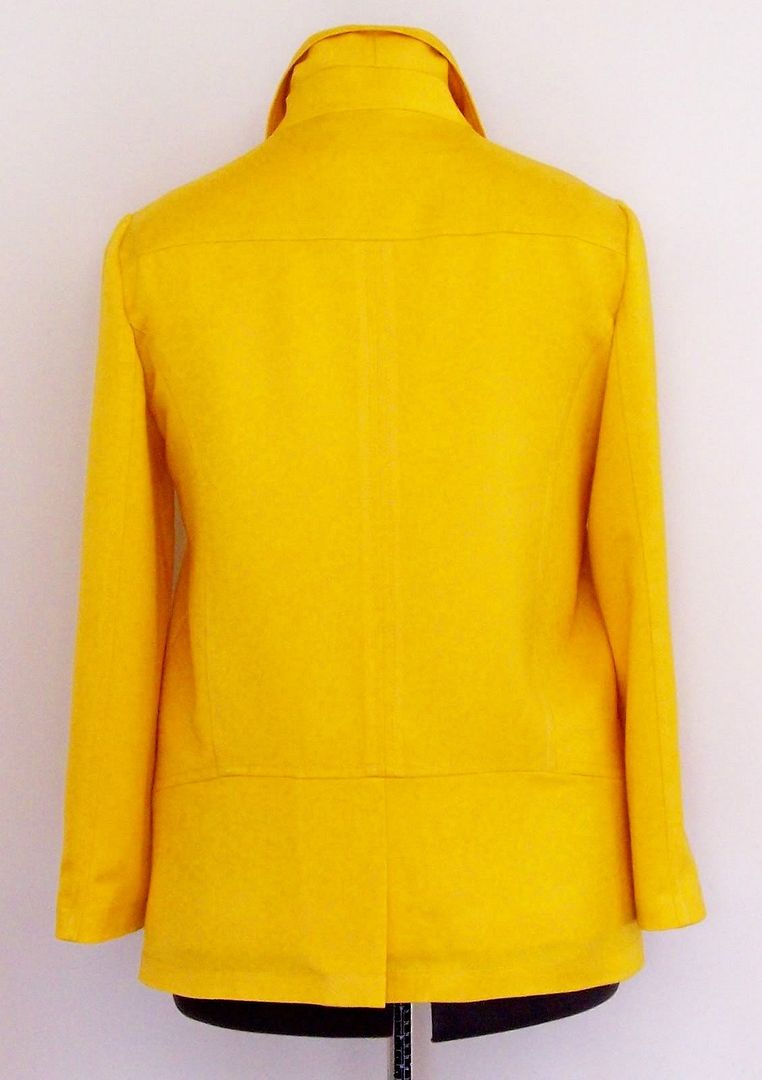
Project Details
Pattern: Vogue 8480
Fabric: Silky Wool
Lining: Silk Charmeuse
Notions: Bias tape, chain, five - Dritz Cover Buttons (1 1/8"), five - 1/2" buttons, one - 1" button, Palmer/Pletsch PerfectFuse Medium Interfacing
Description:


The instructions were very easy to follow and all of the pattern pieces were very well drafted. There was nothing that I disliked about this pattern. I really love the topstitched details, the pleating. The pockets could have been larger and deeper though.
I was browsing in Hancock and discovered this fabric and it just happened to be the perfect color. When I saw this pattern, I knew right then that I would make it in one of the "happy" Spring colors and I knew it had to be bright... a standout color. This fabric was with the wools & wool blends and was on sale when they were. The label said, "100% silky wool". It feels wonderful and it has the texture of a twill.
The Inside
The fabric was a bit lightweight for my jacket standards, so I decided to line it. I had leftover silk charmeuse from the Chanel project and decided to partially line... only the body and not the sleeves. For all of the exposed seams, I used a Hong Kong finish. And I added a hang chain.
Oh, almost forgot... I added 3 inches the body and the sleeves.
The Buttons and Buttonholes
I couldn't for the life of me find buttons that "did it for me". I did my usual and just covered them. All of the high-end RTW jackets I saw had bound buttonholes and of course mine would have them too. I used regular machine buttonholes on the facing. I also decided to use a button to hold the lapel down (just a design feature), since I'll never fastened it up to the neck. I reinforced the shank buttons on the facing side with the 1/2" flat buttons by stitching through both buttons.
The Undercollar and Center Back Seam
The undercollar is traditionally cut on the bias in two pieces with a center back seam. This is essential to make the collar roll softly around your neck. This pattern has a full pattern piece. I folded the pattern piece in half and creased it at the center back. I opened it out and added a cutting line 5/8" from the crease. I cut along the line to create a new undercollar pattern and added a bias grain arrow so I would remember to cut it that way.
The instructions suggested that center back seam of the jacket is pressed to one side and topstitched 3/8" from the seam. I didn't like that at all... it lacked symmetry. I pressed the seam allowance open and created a welt seam which is a regular seam pressed open and topstitched from the right side on both sides of the seam.
All of the hems are 1 1/4" wide and interfaced. An interfaced hem adds weight and improves the way a garment hangs. Also, at the mitered corners, I inserted a penny into each one for additional weight so that the corners would hang correctly.
Even with the minor changes I made, I think it still looks like the pattern envelope.


No comments:
Post a Comment